使用过的组件及API
KeyboardAvoidingView、View、ListView、Navigator、RefreshControl、ScrollView、Text、TextInput、TouchableHighlight、WebView、Alert、AppRegistry、AsyncStorage、BackAndroid、Dimensions、Keyboard、StyleSheet、Platform、Picker、Geolocation、InteractionManager、Vibration
初始化工程
react-native init ProjectName 初始化的工程。
react-native init ProjectName –version 0.42.0 初始化指定版本react-native工程。
工程重命名:工程代码中有工程名称,所有不好直接给工程重命名,可能需要重新初始化一个项目,然后将代码复制过去。
如果要修改App显示名称,将/android/app/src/main/res/values/strings.xml 中修改app_name改为想要的名字即可。
项目名称修改
目前只找到了针对Android的项目名称修改的方法,如将项目名称修改为HelloRN,步骤如下:
- /package.json 中修改name属性值为”HelloRN”
- /index.android.js 中修改根组件名称为”HelloRN”及AppRegistry.registerComponent(‘HelloRN’, () => HelloRN);
- 包结构修改为/android/app/src/main/java/com/hellorn
- /android/app/build.gradle 中修改applicationId为”com.hellorn”
- /android/app/src/AndroidManifest.xml 中修改package为”com.hellorn”
- /android/app/src/main/java/com/hellorn/MainActivity.java 中getMainComponentName方法的返回值修改为”HelloRN”
- /android/app/src/main/res/values/strings.xml 中修改app_name为”HelloRN”
针对IOS项目名称修改的方法还未找到?
android启动图标
- /android/app/src/main/res/mipmap-hdpi目录下,替换ic_launcher.png图片,72×72
- /android/app/src/main/res/mipmap-mdpi目录下,替换ic_launcher.png图片,48×48
- /android/app/src/main/res/mipmap-xhdpi目录下,替换ic_launcher.png图片,96×96
- /android/app/src/main/res/mipmap-xxhdpi目录下,替换ic_launcher.png图片,144×144
android首屏背景
- /android/app/src/main/res/drawable-hdpi目录下480×800,添加png图片
- /android/app/src/main/res/drawable-mdpi目录下320×480,添加png图片
- /android/app/src/main/res/drawable-xhdpi目录下720×1280,添加png图片
- /android/app/src/main/res/drawable-xxhdpi目录下1080×1920,添加png图片
/android/app/src/main/res/values/styles.xml
android项目版本号修改
/android/app/目录下修改build.gradle文件:
|
|
启动项目
react-native run-android 在android启动项目,如果运行在真机,需要摇晃手机调出开发者菜单->Dev Settings->Debug server host for device,进行IP和端口的设置。
react-native run-ios 在ios启动项目。
无论是运行上面哪个命令,都会打开一个启动package服务的命令行窗口,如果没有打开这个窗口,请用react-native start手动启动package服务,react-native start –port XXXX 开启服务的时候直接指定端口号。
如何使用 Ant Design Mobile
npm install antd-mobile --savenpm install babel-plugin-import --save-dev- .babelrc中配置如下 12345678910111213{"presets": ["react-native"],"plugins": [["import",{"libraryName": "antd-mobile"}]]}
如何使用图标
Android上直接使用Ant Design Mobile的Icon组件没有效果,个人感觉Icon只支持移动Web。如果想使用图标,目前用过两种方式:
- 将Iconfinder中图标的Base64编码值定义为变量,在使用地方的uri值指定为该变量。该网站上比较容易找到配套图标,就是点击和未点击配套的图标,但是不能改变图标颜色。
- 使用FontAwesome,配置方式详见react-native-vector-icons。使用该图标可通过style指定图标样式,包括颜色,但要找配套的图标比较困难。
注意FontAwesome中描述<i class="fa fa-user" aria-hidden="true"></i>使用图标,这应该是移动Web的使用方式,在React Native中使用如下。
|
|
如何设置样式
StyleSheet提供了一种类似CSS样式表的抽象。const styles = StyleSheet.create()传入样式定义的对象,该对象键为样式名称,值为定义样式的对象。使用时通过styles的键名即可引用到对应的样式。也可以使用内联样式,但比较低效,内联样式对象会在每一个渲染周期都被重新创建。
Stylesheet.Create方法是可选的,但有一些重要的优势。它保证了值是不可变的,并且通过将它们转换成指向内部表的纯数字,保持了代码的不透明性。将它们放在文件的末尾可保证它们在应用中只会被创建一次,而不是每一次渲染周期都被重新创建。
我在RN工程中定义了styles目录,将每个组件引用的样式单独定义成组件同名的文件放在该目录,想要做到样式独立管理,但有些样式可能是根据组件中的一些属性定义的,还是不可避免的要放到组件定义的文件中。
React Native支持部分样式属性,不同的组件有些样式属性也是不能使用的,会报红屏错误。下面是在源码中添加console.log打印出的可用的样式属性。
如果当前元素的父元素没有使用弹性盒模型,也就是没有flex属性,则只给当前元素flex属性是不起作用的。
文字可以用’\n’换行,如<Text>这是内容...{'\n'}这是内容...</Text>。
样式适配问题
React Native中指定大小通常只能使用数字,不能使用百分比,这样就存在在一个设备上设定好的样式,换一台设备可能就变样了。
- 使用flex布局能解决一部分问题
- 使用Dimensions获取屏幕宽度、高度,通过计算指定样式
- onLayout回调函数可得到组件被加载时的放置状态以及监听设备放置状态
- 使用measure成员函数以得到组件当前的宽、高与位置信息
个人感觉关于样式适配还是存在问题,我们自己指定的样式,可以知道样式值的大小,但如果使用了Ant Design Mobile等其它组件,有些样式值是不知道,也无法通过代码动态获取到,只能查看源码找到相应值,再进行计算,这样可能不把握。
Navigator组件的使用
Navigator是React Native提供的路由管理的组件,通常一个工程中只有一个Navigator组件,个人感觉放在index.android.js文件中比较好,还有对物理返回键BackAndroid的管理最好也放在这里,常用的就是push和pop方法,push时可传入参数。具体使用方法参见React Native中文网-Navigator即可。
- 使用时好像必须作为render的根组件返回,即使外面包层View,都不会有显示内容
- 如果在TabBar.Item中返回的Navigator组件,路由切换时页面底部的TabBar一直存在
- navigator需要作为属性一直向下传递,否则子组件无法引用
ES6语法问题
ES6语法不需要在babelrc文件中配置东西,但有的es6语法用不了,目前发现的是startsWith和new Date()传入日期字符串的构造函数,不报任何错误信息,但是打开浏览器调试时是好使的。网上查原因是打开调试是通过浏览器处理js的,浏览器认识这些语法,但到手机上就不认识了。
这个问题很奇怪,一开始感觉是babel配置不对,但是大多数ES6甚至ES7的语法是没问题的。在网上没有查到react-native具体怎么配置babel,查看过react-native源码babel的配置,改成一样的配置也没解决这个问题。
TextInput触发两次onSubmitEditing问题
在Android手机上,当软键盘的确定/提交按钮被按下的时候调用onSubmitEditing函数。但在做demo时发现该函数会被调用两次,stackoverflow给出一个解决方案如下:
该解决方案以点击软键盘确认执行搜索为例,意思是点击确认时触发失去焦点,当文本输入结束后调用搜索方法(或其它方法),但会存在输入时,如果不点击确认,直接点击页面其它区域,会直接触发搜索方法。
ListView组件的使用
ListView是React Native核心组件,使用时注意以下几点。
- ListView最好添加enableEmptySections属性,处理ListView没有显示数据时报的黄色警告。
- 如果发现列表没滑倒底部就调用onEndReached回调方法了,可以试试设置onEndReachedThreshold值。
- 如果在onEndReached回调方法中进行的是获取更多数据的操作,注意判断条件是否正确,如当前页数已为最大页数或数据已达到总条数,如果还继续执行获取数据操作,有可能导致一直执行获取数据的操作,就像死循环一样。
TouchableHighlight的使用
使用时建议里面包裹React Native提供的组件,而不要使用自定义的组件,否则会报Touchable child must either be native or forward setNativeProps to a native component.的错误信息。如果非要使用自定义组件,需要给自定义组件添加setNativeProps方法,参见React Native中文网-直接操作。
网络请求
可直接使用React Native已经封装好的fetch。查看了react-native的package.json文件,在依赖中与fetch相关的只有node-fetch和whatwg-fetch,在node-fetch和whatwg-fetch中都添加了打印语句,发现打印的都是来自whatwg-fetch的。但在《React Native跨平台移动应用开发》书中第12章提到,“React Native框架在初始化项目时,安装了node-fetch包,开发者可以使用node-fetch包通过HTTP协议来获取网络册的数据”。
消息提醒
可使用react-native-push-notification组件进行消息提醒。
组件间交互
React Native用起来感觉跟React差不多,目前发现复杂的地方还是组件间的交互问题。如对于如下结构的组件
场景描述:A拥有B、C组件,B、C组件都会进入D组件,在D组件中需要调用B、C中的方法。
解决方案:我使用的方法是给A的state添加两个属性methodB、methodC,初始可为null,添加一个可以更新state的方法update,将methodB、methodC、update一起传入B、C中,在B、C组件调用update方法将methodB和methodC赋值给A的同名state属性,这样在D中就可调用到B和C的方法了。
同步异步问题
React Native在使用fetch进行网络请求是异步的,有时我们想要的是同步的效果,或是执行状态的更新setState后的操作,这时可以使用async函数。
场景一
如下代码执行后,输出的state并不是methodA方法中更新后的state。
使用async await后即可输入更新后的state。
场景二
AsyncStorage的get操作是一个异步操作,如果将所有AsyncStorage操作放在一个文件中管理,在组件中要获取缓存中的信息以决定下一步操作时,可以使用如下方式。
场景三
根据fetch请求的返回结果决定下一步的操作。
调试问题
在Android上连续两个R键可进行刷新,ctrl+M可打开调试菜单,可以选择Debug JS Remotely启动浏览器的调试工具进行调试,主要是使用console.log打印日志或是debugger进行断点查看。
当你加载了开启Chrome调试工具的React Native应用之后,Google的Chrome浏览器便会通过React Native包管理器使用一个标准的<script>标签来执行相同的JavaScript代码,因此你可以拥有一个基于浏览器的调试器。随后,包管理器使用WebSocket进行设备与浏览器之间的通信。
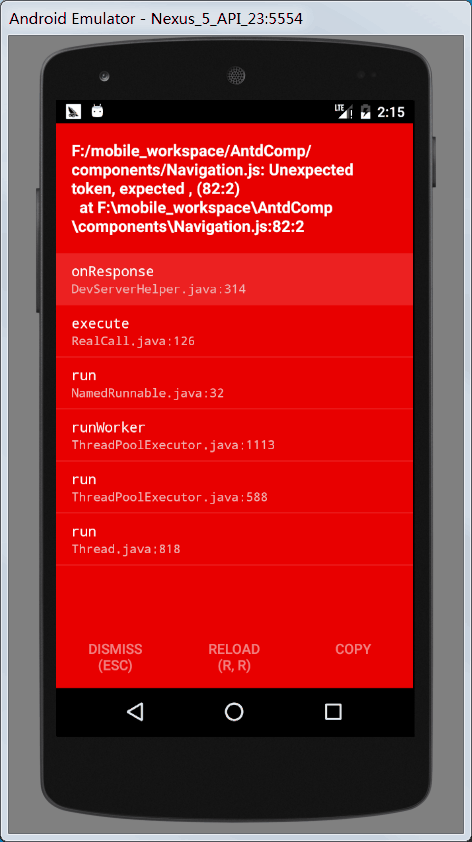
如果Packager的控制台编译未完成或模拟器报Unexpected token,很有可能是存在语法错误。

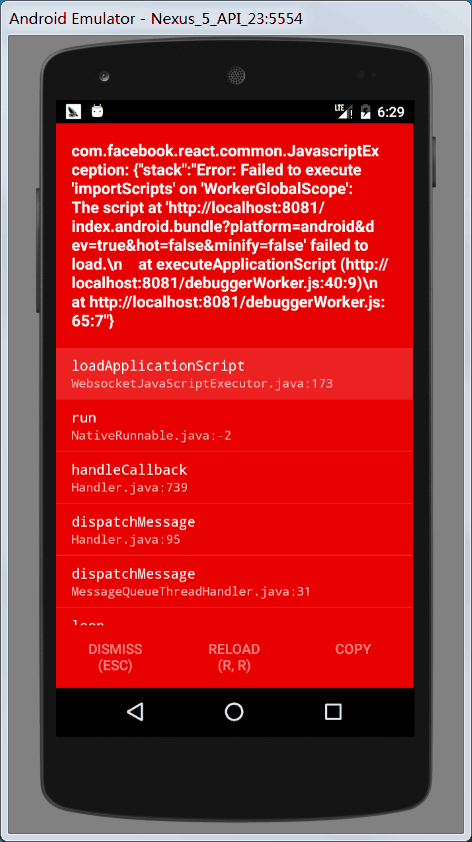
如果模拟器报如下错误,不容易定位到哪里发生了错误,打开浏览器调试工具->Network,点击显示红色的请求,Preview里面错误信息。


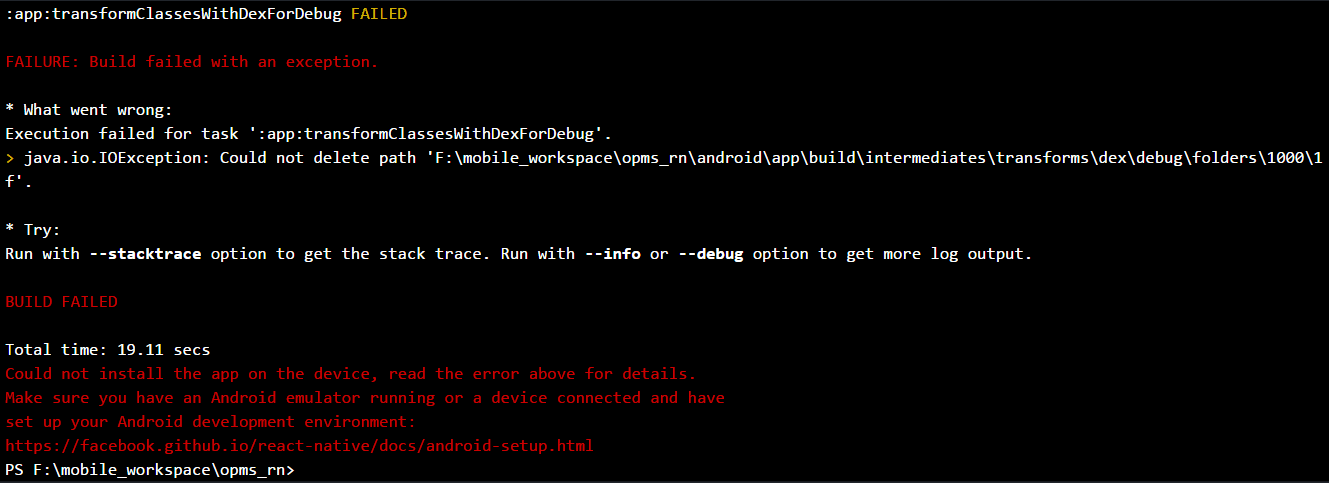
如果模拟器报如下错误,哪里都不要改,重新执行react-native run-android重新启动,直到启起来。

如果用 ios 模拟器调试时所有操作都变得很慢,检查模拟器 → Debug → Slow Animations 是否为选中了,取消选中即可。
React 调试
直接使用Debug JS Remotely启动浏览器的调试工具是没有React组件调试的。按如下方式可以进行React组件 调试,但React调试和浏览器的调试 http://localhost:8081/debugger-ui 不能同时使用。
|
|
Redux支持
跟React使用redux是一样的,在用浏览器的调试工具进行redux调试时,需要特殊处理。目前Windows上是安装remote-redux-devtools的0.5.0版本,在react-native为0.34.0时是好使的,但是react-native为0.42.0时就不好使了,感觉应该是目前还不支持0.42.0。
安装依赖
package.json里添加
configureStore.js修改
启动
Webpack支持
Webpack有一段介绍如下:
Webpack是Web前端打包的工具,不是用在移动端的。如果要在浏览器上运行React Native项目,就需要Webpack了。
运行在Web浏览器上面
参考三步将 React Native 项目运行在 Web 浏览器上面或者Ant Design Mobile的MobileDemo怎么在Web端运行的。
注意:
- react、react-dom 版本为15.3.x,否则可能会报错
- webpack.config.js中要有publicPath,如下说是,否则可能会报错
|
|

已经按照教程测试过,简单的组件可以跑在浏览器上,可以使用浏览器的React调试工具看组件的结构。使用React Native的StyleSheet定义的样式在Web端也生效,可以使用div等html的标签。
但是我现在还不明白React Native 项目运行在Web浏览器上面是为了方便测试,还是为了一套代码可以运行在三端。像我测试中用的React Native的Button组件在浏览器上显示是占满屏幕整个宽度的,还有进行网络请求用的fetch报错了。不是简单的一套代码就能运行在三端,但是个人感觉样式和redux的部分是可以公用的,可能显示组件需要调整。
组件不显示
如果组件没显示出来,还没有报错,可鞥是组件外层没有高度,换成ScrollView或者显示指定height试试。
初始化的项目启动报错
在一个目录下执行react-native init project_name 初始化了一个项目,能跑起来。但换个目录再执行 react-native init project_name 初始化同名项目,即使什么都没修改,也可能跑不起来,会报如下错误。但换个目录可能就能跑起来了,很奇怪。

在网上查了很多都没有找到原因,github上也有人发现类似问题。

这时请确认是否使用了babel-plugin-transform-runtime依赖及使用是否正确,很有可能是这个依赖导致的,如果没用可以去掉。我在去掉之后再没有发现这个问题。
项目启动报错
如果项目启动时报Could not find com.atlassian.mobile.video:okhttp-ws-compat:3.7.0-atlassian1.错误,在android/build.gradle文件中,allprojects中添加如下代码即可。
|
|
平台扩展名及平台检测
React - Native InteractionManager 动画交互管理器
链接原生
|
|